Sunday, April 9, 2017

Tutorial: Altering Cheap Gloves for Text


Assalaamu alaikum, ladies! We've all seen the cheapo, $3 niqab gloves pictured above, sold on various sites in a myriad of colors. And I bet we've all had the struggle of wearing gloves and having to take the gloves off to use our phones, whether it be for texting, to make a call, or to read Quran. It's a HASSLE. But as shown in my texting-glove review, gloves that are made smart-phone capable can be EXPENSIVE, and not all of us have the ability to just run out and buy a $30 pair of gloves (especially if you have a tendency to lose only one in a pair, like me...).

Due to this, I figured out a way to alter the gloves in order to allow for smart-phone usage. No, this doesn't involve some magic metal glue or metalic yarn... It's super easy, and you only have to do it once! What did I do? I created slits!

What you are probably expecting... 
No, they aren't ugly and easy to spot. Don't worry! These slits are so sneaky, you can't even tell they are there!

Finished product.

So, how do we get these super awesome sneaky slits? Well, unfortunately you have to start out by making the ugly slits in the first photo. THEN, turn the glove inside out so you can see the inside portion of the thumb. 


We are going to create two stitches on each side of the slit, with the part of the glove which is going OVER my thumb in the photo being on top of the stitch, so it overlaps (my thumb is the same direction as the thumb of the glove).


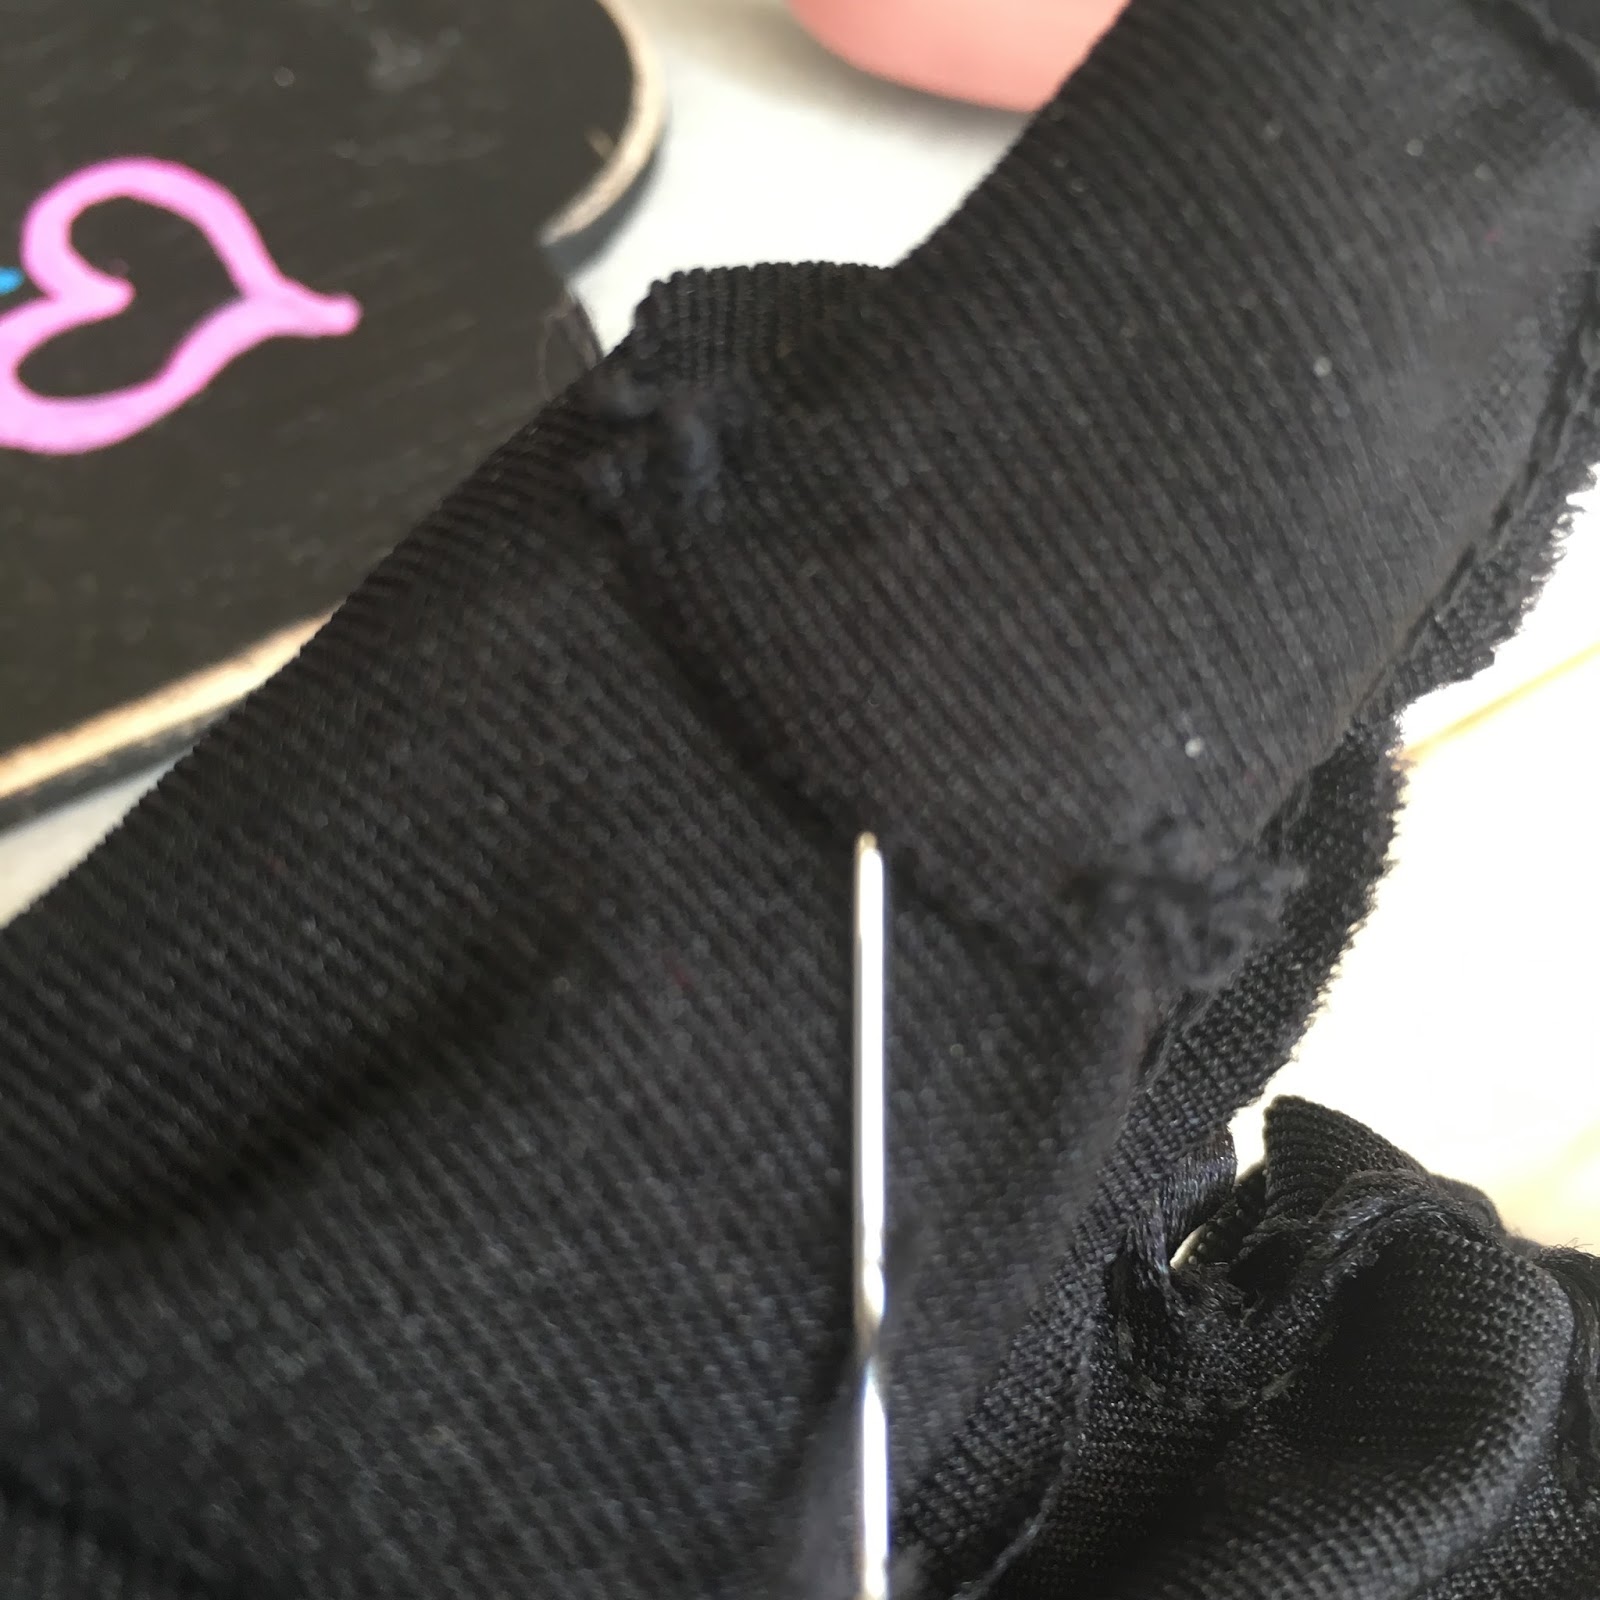
This is the thumb inside out, with two stitches, one on each side. I made each stitch a triple stitch to keep it from coming out or pulling easily.

Now, flip the glove right-side out, and test your thumb-slit!

If the slit feels too big or is easily noticable, just turn everything inside out again and put in a third stitch. 
Aaaaand, you're done! From the front and back of the glove, it's virtually unnoticeable, and now you no longer have to take off your gloves and compromise your modesty and/or mental health in order to use your phone. 

Enjoy  ladies! Jazakum Allahu kheiran!

Sajida.

Tutorial: UAE-Style Gashwa


Assalaamu alaikum, ladies! Today's tutorial is how to create your own UAE-Style Gashwa, as shown above! Also known as a ghatwa or boushiya, it's a square or rectangle of fabric consisting of several layers, one of which is flipped down to cover and conceal the face. Women wear these both with and without separate niqab. The one in the picture above is an actual UAE gashwa. The one we are creating today includes pins, but they can be removed if preferred.


First step in creating your gashwa is picking a scarf or fabric. The ones you can get in the UAE are made of a thin cotton or gauze-like fabric, which, as you can see, is very sheer. This has the added benefit of increased breath-ability, heat control, and sight. If you plan to make a permanent one, I would suggest trying several fabrics to find one you can see out of well. The scarf I used is a georgette fabric wide rectangle scarf from Al-Mujalbaba, which can be purchased here. This fabric gives an increased opacity as opposed to the cotton gauze used traditionally. However, it can be a little harder to see out of as well as warmer in the sun.

You'll want a rectangular piece:


From here, we will fold it in half, creating more of a square: 


You then fold it in the same direction one more time. I prefer a layered look, but you can also fold it so it is completely even.


You can be finished here. I, however, added pins in order to give increased stability of the gashwa due to my using a cane. If you want to add pins, you can proceed as below, adding as many or few as you wish:


Where the pins are is also where one would stitch across, if desired, but on the inside, at the point where you would wish to fold your gashwa (so you would be stitching across TWO layers, not the four as here). You could then also cut so the bottom, folded "layer" so it becomes two separate layers. 


Next, if you pinned it, flip it so the pins are on the inside of the four layers. You'll see a sort of crease: 


Then, place it on your head and flip down the upper-most layer. You can pin the bottom layer to your underscarf if desired, but the weight and construction of the gashwa keeps it on your head pretty well (it was VERY windy outside while I was filming!). Adjust as you like, and you're done!


Pretty simple! Using the scarf I used, the gashwa is so opaque that I have no qualms about being outside without a niqab underneath it. The cut and shape of the gashwa is also such that one doesn't necessarily need a separate hijab on underneath of it, unless you will be out and about when you need to pray namaaz.

Jazak'Allah khair, and enjoy!

Sajida.